Spring Boot + MyBatis 프로젝트 연습 목록
- 01. 신규 Spring Boot 프로젝트 만들기
- 02. Thymeleaf, spring-boot-devtools 추가 (현재 포스트)
앞서 '신규 Spring Boot 프로젝트 만들기'로 프로젝트를 생성하였습니다. 이번 포스팅에서는 뷰를 위한 템플릿 엔진인 Thymeleaf와 개발상의 번거로움을 줄여주는 spring-boot-devtools을 추가하기로 합니다.
Thymeleaf 추가
뷰를 위한 템플릿 엔진 Thymeleaf (Thymeleaf is a modern server-side Java template engine for both web and standalone environments.)
1. pom.xml 에 아래 내용 추가
... 생략 ...

	<dependencies>
		<dependency>
			<groupId>org.springframework.boot</groupId>
			<artifactId>spring-boot-starter-web</artifactId>
		</dependency>

		<dependency>
			<groupId>org.springframework.boot</groupId>
			<artifactId>spring-boot-starter-test</artifactId>
			<scope>test</scope>
		</dependency>

		<!-- thymeleaf 의존성 추가 -->
		<dependency>
			<groupId>org.springframework.boot</groupId>
			<artifactId>spring-boot-starter-thymeleaf</artifactId>
		</dependency>
	</dependencies>

... 생략 ...
-
참고 : 프로젝트 생성 시에 의존성 선택 화면에서 Thymeleaf 선택하면 자동으로 추가된다.
2. Thymeleaf 파일 추가 및 Controller 매핑하여 확인
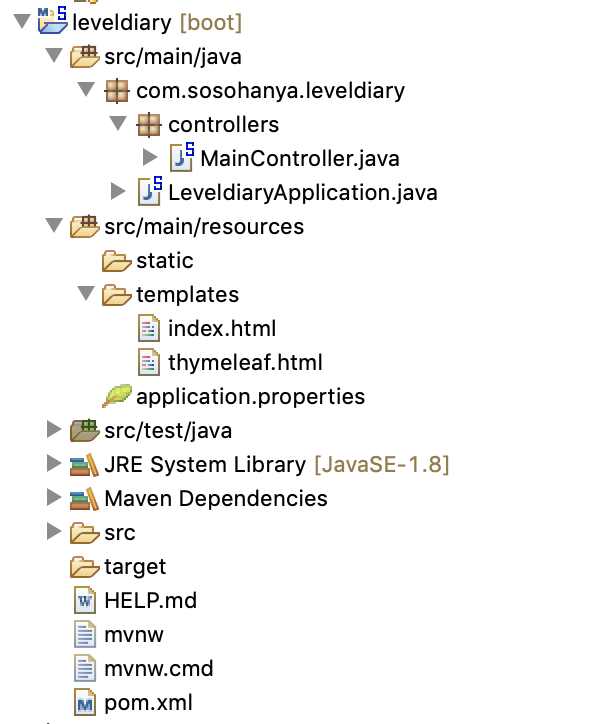
- Thymeleaf 파일은 [src/main/resources/templates] 폴더에 thymeleaf.html 파일 추가
- Thymeleaf는 html 형식으로 표현된다. 이것이 Thymeleaf의 장점 중 하나이다. 자세한 내용은 Thymeleaf 공식 웹사이트[새창]에서 확인
아래는 thymeleaf.html 파일
<!DOCTYPE html>
<html>
<head>
<meta charset="UTF-8">
<title>Insert title here</title>
</head>
<body>
thymeleaf 확인
</body>
</html>
아래는 앞선 '신규 Spring Boot 프로젝트 만들기'에서 만들었던 MainController.java 파일에 thymeleaf.html 을 매핑
@Controller
public class MainController {

	@GetMapping("/")
	public String index() {
		return "index";
	}

        //이 부분 추가
	@GetMapping("/thymeleaf")
	public String thymeleaf() {
		return "thymeleaf"; //thymeleaf.html과 매핑
	}
}
3. 서버 재시작 후 브라우저에서 확인 : http://localhost:8080/thymeleaf
4. 브라우저에서 http://localhost:8080/ 에 접속하면 Whitelabel Error Page가 표시.
- 템플릿 설정(pom.xml)으로 인해 [src/main/resources/static] 폴더가 아닌, [src/main/resources/templates] 폴더에서 매핑 파일을 찾는다. 그런 이유로 [src/main/resources/static] 폴더에 생성해둔 index.html을 못 찾게 되어 에러가 발생.
- [src/main/resources/static] 폴더에 있는 index.html을 [src/main/resources/templates] 폴더로 이동시킨다.
- 이동 후 브라우저에서 http://localhost:8080/ 로 다시 접속하면 제대로 표시되는 것을 확인할 수 있다.
- 참고로 MainController에서 return "index.html"; 로 해도 제대로 표시가 되고, return "index"; 로 확장자를 삭제해도 제대로 표시되는 것을 확인했다.
> 이것은 View Resolver의 suffix가 기본적으로 .html로 설정되어있어 가능
> application.properties 파일에서 spring.thymeleaf.suffix=.htm 로 변경해보면 Whitelabel Error Page가 표시됨을 확인할 수 있다. index.html 파일을 index.htm 파일로 변경해보면 제대로 나오는 것도 확인 가능하다.
> 하지만, 기본 설정이 .html 이므로 특별한 상황이 아니면 spring.thymeleaf.suffix= 를 따로 설정할 필요는 없을 듯하다.
spring-boot-devtools 추가
빈번한 변경으로 인한 개발상의 번거로움(서버 재가동, 사이트 확인시 reload)을 줄여주는 개발 환경 개선 도구.
보다 자세한 내용은 Spirng Boot Reference - Developer Tools[새창]를 확인
1. pom.xml 에 아래 내용 추가
<dependencies>
  ... 기존 내용 생략 ...
	<dependency>
		<groupId>org.springframework.boot</groupId>
		<artifactId>spring-boot-devtools</artifactId>
		<optional>true</optional>
	</dependency>
</dependencies>- 참고 : 프로젝트 생성시에 의존성 선택 화면에서 Spring Boot DevTools 선택하면 자동으로 추가된다.
2. 서버 재시작
3. 이후부터는 java 파일을 변경하고 저장하면 수동으로 재시작할 필요 없이 자동으로 서버가 재시작(Restart)된다.
4. 서버 재시작과 별도로 리소스가 변경될 때 브라우저에서도 자동으로 새로고침(Reload)되도록 LiveReload 설치
- Chrome, Firefox, Safari에 있는 확장 프로그램이다.
- spring-boot-devtools 모듈에는 리소스가 변경될 때 브라우저 새로고침(refresh)을 트리거하는 데 사용할 수 있는 LiveReload 서버가 포함되어있어 가능
- 크롬의 경우
1. livereload 또는 livereload 크롬 확장 프로그램 으로 검색 및 설치
2. 활성화하면 리소스 변경이 있을 경우 자동으로 reload. (약~간의 시간차는 있음)


지금까지의 내용은 github에 branch:002-add-thymeleaf-devtools로 확인[새창]하실 수 있습니다.
Spring Boot + MyBatis 프로젝트 연습 목록
- 01. 신규 Spring Boot 프로젝트 만들기
- 02. Thymeleaf, spring-boot-devtools 추가 (현재 포스트)
'냐냐한 IT > 냐냐한 Spring Boot' 카테고리의 다른 글
| MyBatis Logging 추가 (0) | 2019.09.25 |
|---|---|
| Spring Boot + H2 + MyBatis로 사용해보기 (0) | 2019.09.22 |
| Spring Boot + H2 + Jdbc로 사용해보기 (0) | 2019.09.20 |
| Spring Boot에 H2 추가 (0) | 2019.09.16 |
| 신규 Spring Boot 프로젝트 만들기 (2) | 2019.09.12 |